How to Edit a PDF Document Using LightPDF
Editing PDF documents can sometimes be challenging, but with tools like LightPDF, it becomes a breeze. In this blog post, I'll guide you through the steps to edit a PDF document using LightPDF and highlight its key features.
Step 1: Opening Your PDF in LightPDF
To start editing your PDF, you first need to open it in LightPDF.
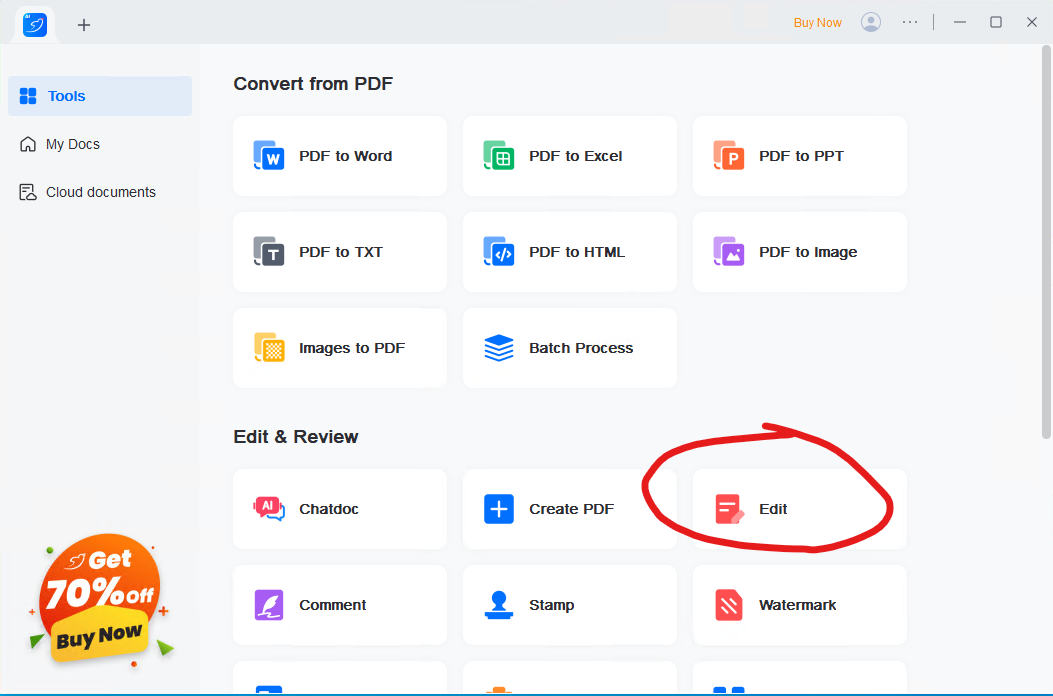
Description: Screenshot showing how to open a PDF file in LightPDF.
Step 2: Editing Text in Your PDF
LightPDF offers a user-friendly interface to edit text in your PDF. You can easily add, delete, or modify the text.
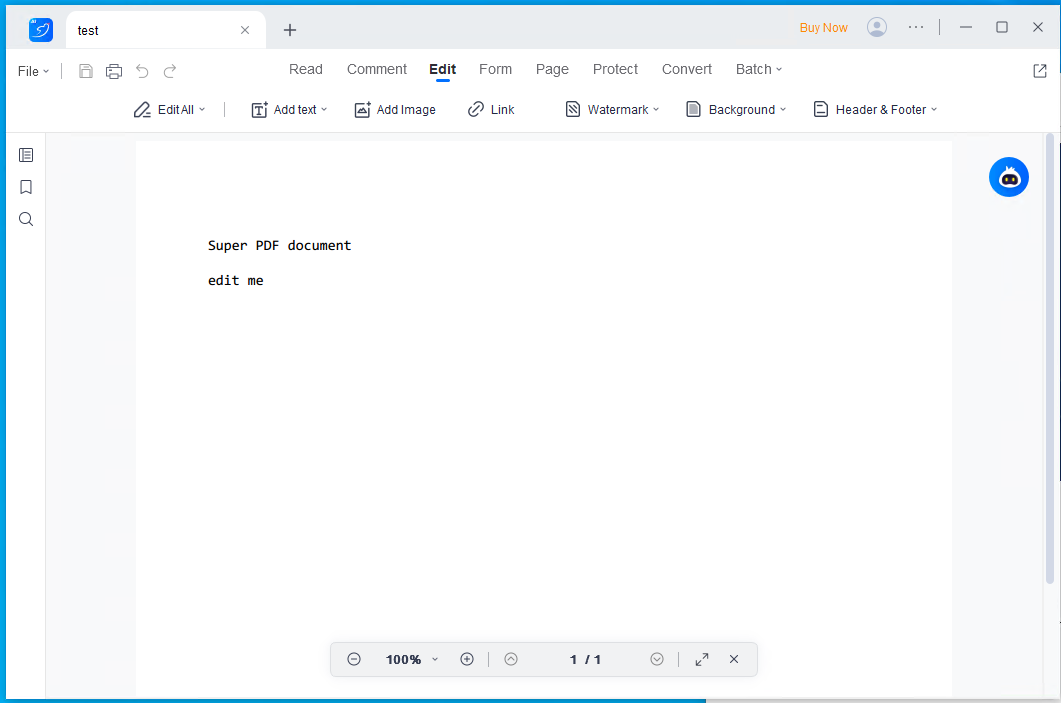
Description: Screenshot showcasing text editing features in LightPDF.
Step 3: Adding Images and Graphics
Enhance your PDF by adding images and other graphics. LightPDF allows you to insert images easily into your document.
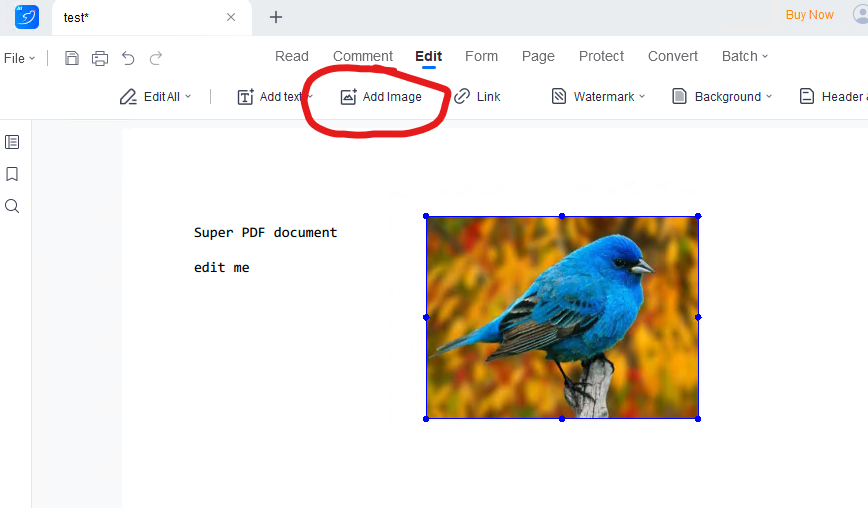
Description: Screenshot demonstrating how to add images in LightPDF.
Step 4: Saving Your Edited PDF
Once you have finished editing, you can save your document. LightPDF provides different options to save your work.
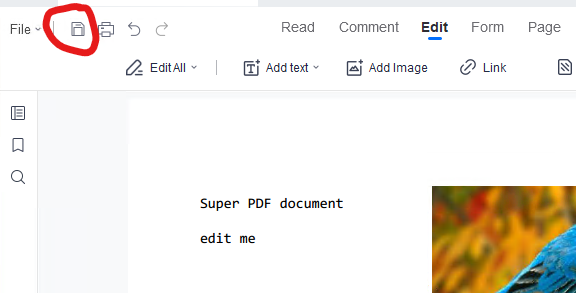
Description: Screenshot showing the save options in LightPDF.
Conclusion
LightPDF is an excellent tool for quick and efficient PDF editing. Its intuitive interface makes it suitable for both beginners and advanced users.