Adding Watermarks to Your Documents with LightPDF
Protecting your documents is crucial, especially when they are shared widely. Adding a watermark is an effective way to safeguard your content. LightPDF offers a simple and efficient way to do this. This guide will walk you through the process of adding a watermark to your PDF using LightPDF. Introduction to Watermarks
A watermark is a text or an image overlaid onto a document, typically used for copyright protection or to denote the status (like 'Confidential'). LightPDF provides an easy way to add these to your PDFs.
Step 1: Open Your Document in LightPDF
Start by opening your PDF in LightPDF. This is your first step towards adding a personalized watermark.

Description: Screenshot showing how to open a PDF in LightPDF.
Step 2: Accessing the Watermark Tool
Navigate to the watermark tool in LightPDF. This feature allows you to add custom watermarks to your document.
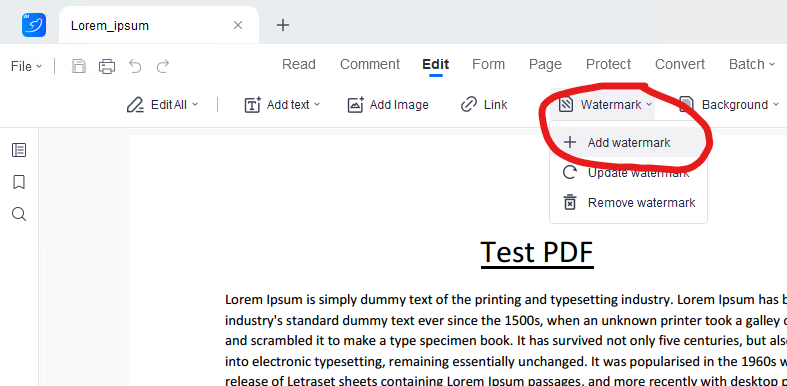
Description: Screenshot highlighting the watermark tool option in LightPDF.
Step 3: Creating Your Watermark
In the watermark settings, you can choose to create a text or image watermark. Customize the font, size, color, opacity, and position of your watermark as needed.

Description: Screenshot displaying the watermark creation interface, with options for customization in LightPDF.
Step 4: Applying the Watermark
Once your watermark is ready, apply it to your document. You can preview it before finalizing.
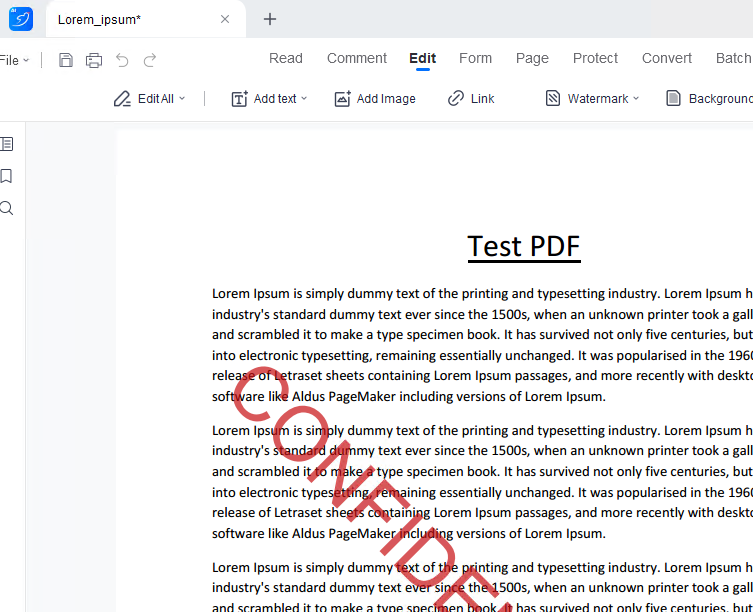
*Description: Screenshot showing the application of the watermark on a PDF document in LightPDF.*A
Step 5: Saving Your Document
After applying the watermark, save your document. LightPDF allows you to save the edited file with your new watermark in place.
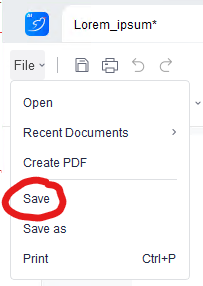
Description: Screenshot illustrating the saving process of the watermarked document in LightPDF.
Conclusion
Adding a watermark to your PDFs with LightPDF is a straightforward process that adds a layer of security and professionalism to your documents. Whether you are looking to protect your content or brand your PDFs, LightPDF makes it easy.